

All products are selected by our Sharp Survivalist editors. If you buy something through our links as an Amazon Associate we earn from qualifying purchases.
Whether you’re deep in old-growth forest or navigating open highland terrain, knowing how to set up or construct a bushcraft camping shelter can be the difference between a miserable night and a genuinely restorative one. This guide covers everything from primitive debris huts to modern tarp systems, helping you match the right shelter to your environment, skills, and gear.
What Is a Bushcraft Camping Shelter?
A bushcraft camping shelter is any structure — natural, improvised, or purpose-built — used to protect a person from the elements during wilderness survival or primitive camping. Unlike conventional tents, bushcraft shelters prioritise adaptability, low environmental impact, and the use of available natural materials or minimal gear.
The core philosophy of bushcraft emphasises working with nature rather than imposing upon it. That means reading the landscape, understanding wind direction, identifying natural windbreaks, and selecting materials that insulate and repel moisture effectively.
Types of Bushcraft Shelters
1. Lean-To Shelter
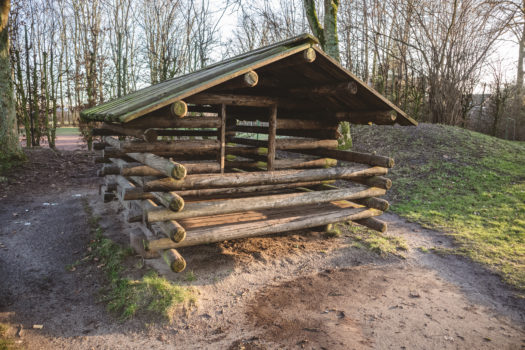
The lean-to is one of the most practical and widely used primitive shelters in bushcraft. It consists of a ridgepole supported between two trees, with branches or saplings leaned against it at an angle and layered with natural debris, leaves, or bark.
Best for: Temperate forests with abundant deadfall material
Build time: 1–3 hours
Skill level: Beginner
A lean-to excels when paired with a fire in front of it — the angled face reflects heat back toward the sleeping area, making it effective in cool to cold conditions.
2. Debris Hut
The debris hut is arguably the most effective natural survival shelter for cold weather. It mimics the insulating properties of a sleeping bag by surrounding the occupant in deep, dry organic matter — leaves, bracken fern, pine needles, and grass.
A sturdy ridgepole is propped between a stump or fork and the ground, with progressively smaller sticks ribbed along each side, then buried under two or more feet of compacted debris.
Best for: Emergency overnight survival, cold temperate climates
Build time: 2–4 hours
Skill level: Intermediate
3. Tarp Shelters
For modern bushcrafters who carry minimal kit, a bushcraft tarp shelter offers unbeatable versatility. A single silnylon or canvas tarp (typically 3×3m or larger) can be rigged into dozens of configurations using paracord, trekking poles, and natural anchor points.
Common configurations include:
- A-frame — symmetric ridge setup, excellent all-round protection
- Plow point — angled forward, deflects driving rain and wind
- Half-pyramid (cat cut) — asymmetric, maximises floor space with low wind profile
- Lean-to tarp — combines natural shelter principles with modern materials
Best for: Multi-day wilderness travel, variable weather conditions
Build time: 5–20 minutes
Skill level: Beginner to Intermediate
4. Wickiup (Tipi-Style Shelter)
A wickiup is a cone-shaped structure built using multiple long poles lashed at the apex, then layered with bark, hides, large leaves, or a tarp. It offers 360° wind protection and can accommodate a small central fire with a natural smoke hole at the top.
Best for: Extended base camps, forested areas with long straight timber
Build time: 3–6 hours
Skill level: Intermediate to Advanced
5. Snow Shelters (Quinzhee and Snow Trench)
In snow-covered terrain, natural insulating properties of packed snow make it an ideal building material. A quinzhee is hollowed out from a mounded pile of snow left to sinter for two hours, while a snow trench is a rapid-build, minimalist option dug directly into the snowpack.
Internal temperatures inside a well-built quinzhee rarely drop below –5°C even in extreme cold, making them exceptional thermal refuges.
Best for: Alpine and arctic environments
Skill level: Intermediate
How to Choose the Right Bushcraft Shelter
Selecting the right shelter depends on five key variables:
1. Environment — Forest, open moorland, alpine, desert, and coastal environments each demand different approaches. Dense canopy provides natural windbreak and material; open ground requires a low-profile, wind-resistant structure.
2. Duration — Overnight emergency shelters prioritise speed; multi-day or base camp setups justify more labour-intensive builds.
3. Weather conditions — Assess rain, wind, temperature, and humidity. In wet climates, prioritise waterproofing and drainage. In cold environments, insulation depth matters more than size.
4. Available materials — Before choosing a design, inventory what’s around you. Abundant leaf litter favours a debris hut. Straight timber favours a wickiup or lean-to. No natural materials available? A tarp system is your answer.
5. Physical capacity — Building a debris hut requires significant physical effort. If you’re injured or conserving energy in a survival situation, a simple tarp pitch or even a bivy bag combined with natural windbreak can suffice.
Essential Bushcraft Shelter Skills Every Outdoorsperson Should Know
- Site selection: Always sleep on high, flat ground away from drainages, widow-makers (dead overhead branches), and ant trails. Avoid valley floors where cold air pools overnight.
- Cordage and lashing: Natural cordage from plant fibres (nettles, inner bark, roots) is a foundational skill for shelter construction without modern rope.
- Waterproofing with natural materials: Layering bark shingles from birch or cedar in overlapping rows, like roof tiles, creates effective water shedding.
- Fire integration: Position fires at the open face of lean-to shelters to reflect heat inward. Never light fires inside enclosed natural shelters due to carbon monoxide risk.
Frequently Asked Questions
What is the easiest bushcraft shelter to build? The lean-to is the easiest bushcraft shelter to build for beginners. It requires minimal materials, no complex lashing, and can be constructed in under an hour with basic tools. Pair it with a fire for significant warmth gain.
Can I build a bushcraft shelter without tools? Yes. Many primitive shelters — including the debris hut and basic lean-to — can be built entirely by hand using deadfall, natural cordage, and available vegetation. A knife improves efficiency but is not essential for all designs.
What is the best shelter for wet weather bushcraft camping? A tarp rigged in an A-frame or plow point configuration offers the most reliable rain protection with minimal build time. For natural shelters in wet climates, a tightly thatched lean-to with at least 45° pitch sheds rain effectively.
How much debris do I need for a debris hut? Enough that you can no longer see your arm when you push it into the pile. In practical terms, the debris layer should be at least 60–90cm thick on all sides to provide adequate insulation in temperatures above freezing.
Is it legal to build a bushcraft shelter in the wild? This varies by region and land ownership. In many national parks and conservation areas, construction of permanent or semi-permanent structures is prohibited. On public or crown land in New Zealand and the UK, temporary shelters for personal overnight use are generally permitted, but always check local regulations before building.
What tools should I carry for bushcraft shelter building? A fixed-blade bushcraft knife, small folding saw or bow saw, and 10–20 metres of paracord cover the vast majority of shelter-building scenarios. A tarp, even a basic one, dramatically expands your options in any terrain.

- 75D Nylon Ripstop Nylon
- Imported
- ★ 𝘽𝘼𝘾𝙆𝙒𝙊𝙊𝘿𝙎 𝘽𝙐𝙉𝙂𝘼𝙇𝙊𝙒 2.0 𝙑𝙚𝙧𝙨𝙞𝙤𝙣: A classic bakers tent that made with 75D Ripstop Nylon fabric, waterproof treated seams with 1500mm waterproof rating, reinforced groments & tie-out points, quality snag free YKK zippers for extra durability and protection