All products are selected by our Sharp Survivalist editors. If you buy something through our links as an Amazon Associate we earn from qualifying purchases.
When you’re lost, injured, or caught off-guard by a sudden storm in the backcountry, your wilderness survival shelter is the difference between life and death. Exposure kills faster than dehydration and starvation combined — hypothermia can set in within hours in wet or windy conditions, even in mild temperatures. Understanding emergency shelters for wilderness survival isn’t just a bushcraft hobby — it’s a core survival competency every hiker, hunter, and outdoor adventurer needs.
Why Emergency Shelter Is Your First Survival Priority
Survival instructors consistently follow the Rule of Threes: you can survive roughly three minutes without air, three hours without shelter in harsh conditions, three days without water, and three weeks without food. Shelter comes first.
Your body loses heat rapidly through conduction (contact with cold ground), convection (wind stripping warmth), radiation, and evaporation (wet clothing). A well-built emergency shelter combats all four mechanisms simultaneously. The goal isn’t comfort — it’s core temperature preservation.
Types of Emergency Wilderness Shelters
1. Debris Hut
A debris hut is one of the most effective natural survival shelters you can build without tools. It uses dead leaves, pine needles, bark, and forest duff as insulation — nature’s own sleeping bag.
How to build it:
- Find or prop a ridgepole 9–10 feet long against a low fork or stump
- Lean branches along both sides to form a ribcage shape
- Pile debris at least 2–3 feet thick over the framework — more than you think you need
- Stuff the interior with dry leaves for ground insulation
- Block the entrance with a debris plug or backpack
A well-built debris hut can maintain survivable warmth even in near-freezing temperatures with no fire.
2. Lean-To Shelter
A lean-to is faster to build and offers fire-reflective benefits, though it’s less thermally efficient than enclosed shelters. It works best in mild weather or when paired with a campfire.
Construction basics:
- Lash a horizontal ridgepole between two trees roughly 7 feet high
- Lean branches or saplings at a 45-degree angle against the pole
- Layer natural materials or a tarp over the framework
- Build a fire in front, with a reflector wall behind the fire to direct heat inward
3. Snow Shelters (Quinzhee and Snow Trench)
In winter wilderness survival scenarios, snow is paradoxically your best insulating material. The interior of a well-built snow shelter stabilizes around 32°F (0°C) — cold, but survivable — regardless of outside temperatures.
Quinzhee: Pile snow into a dome, let it sinter for 2 hours, hollow it out to 4–6 inches thick. Insert stick guides before hollowing to gauge wall thickness. Poke a ventilation hole in the ceiling with a ski pole or stick.
Snow trench: The fastest option. Dig a body-width trench, cover with branches and snow blocks. Insulate the floor with a sleeping pad or pine boughs.
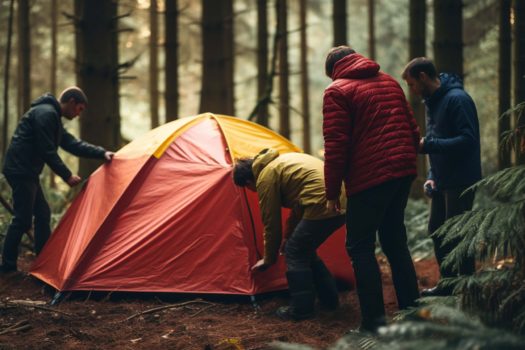
4. Tarp and Emergency Bivy Shelters
If you carry any gear at all, a tarp or emergency bivy sack dramatically expands your options. A lightweight tarp (under 1 lb) can be rigged into multiple configurations: A-frame, plow point, or diamond pitch.
An emergency bivy sack — essentially a reflective sleeping bag shell — can retain up to 90% of your body heat and weighs only a few ounces. Always carry one in your day pack.
Shelter Site Selection: The Overlooked Survival Skill
Even the best wilderness emergency shelter fails if you place it wrong. Choose your site based on:
- Windbreak: Use natural terrain features — hillsides, rock outcrops, dense conifers — to block prevailing winds
- Drainage: Never shelter in a depression or dry creek bed; cold air and water pool there
- Widow-makers: Inspect trees overhead for dead branches
- Proximity to resources: Close to dry wood and water, but above flood lines
- Visibility: If rescue is possible, balance concealment with signal visibility
Essential Bushcraft Skills That Improve Shelter Performance
Knowing how to build a survival shelter and knowing how to build an effective one are different skills. Key techniques that elevate your shelter:
- Cordage from natural materials: Inner bark of basswood, dogbane, or stinging nettle twisted into rope for lashing
- Ground insulation first: At least 4 inches of debris beneath you prevents conductive heat loss to soil
- Size matters: A smaller shelter retains body heat far better — just big enough to lie down and turn over
- Moisture management: Avoid shelter locations with standing water; ensure your roof pitch sheds rain
The 10 Essentials and Shelter Gear to Always Carry
Modern wilderness survival planning means carrying lightweight tools that reduce the work of emergency shelter-building:
- Mylar emergency bivouac sack (2 oz)
- Lightweight silnylon or Dyneema tarp (12–16 oz)
- 50 feet of paracord
- Fixed-blade knife or folding saw
- Fire-starting kit (lighter, ferro rod, tinder)
These items combined weigh under 2 lbs and can mean the difference between a survivable emergency and a fatal one.
Frequently Asked Questions
What is the fastest emergency shelter to build in the wilderness? A snow trench in winter or a simple lean-to in forested areas are the fastest options. Both can be constructed in 20–30 minutes with minimal tools. For true emergencies with no time to build, wrap yourself in an emergency bivy and get off the ground using your pack as insulation.
How long does it take to build a debris hut? A functional debris hut requires 2–4 hours depending on available materials. The insulation layer — the most critical component — takes the longest. Plan to start building well before sunset.
Can a tarp shelter protect against rain and wind? Yes, when properly pitched. A low-profile A-frame or plow-point tarp configuration sheds rain effectively. Guy out the sides tightly and angle the opening away from the prevailing wind. Use a bathtub groundsheet or bivy underneath to prevent ground moisture infiltration.
What temperature can a debris hut keep you warm in? A well-insulated debris hut — with walls and roof at least 2 feet thick and a full debris floor layer — can maintain survivable core temperatures in conditions down to around 20°F (-6°C), even without a fire or sleeping bag.
Is it better to build a shelter or find natural cover? Both. A large fallen tree, rock overhang, or cave provides immediate windbreak and roof — use these as your shelter framework, then augment with debris insulation. Natural features reduce building time significantly.
What common mistakes do people make building wilderness shelters? The most dangerous mistakes are: building too large (heat dissipates), skipping ground insulation (cold ground pulls body heat rapidly), choosing a wind-exposed site, and building in a drainage area. Most beginner shelters are also under-insulated — when in doubt, pile on more debris.

- 75D Nylon Ripstop Nylon
- Imported
- ★ 𝘽𝘼𝘾𝙆𝙒𝙊𝙊𝘿𝙎 𝘽𝙐𝙉𝙂𝘼𝙇𝙊𝙒 2.0 𝙑𝙚𝙧𝙨𝙞𝙤𝙣: A classic bakers tent that made with 75D Ripstop Nylon fabric, waterproof treated seams with 1500mm waterproof rating, reinforced groments & tie-out points, quality YKK zippers for extra durability and protection